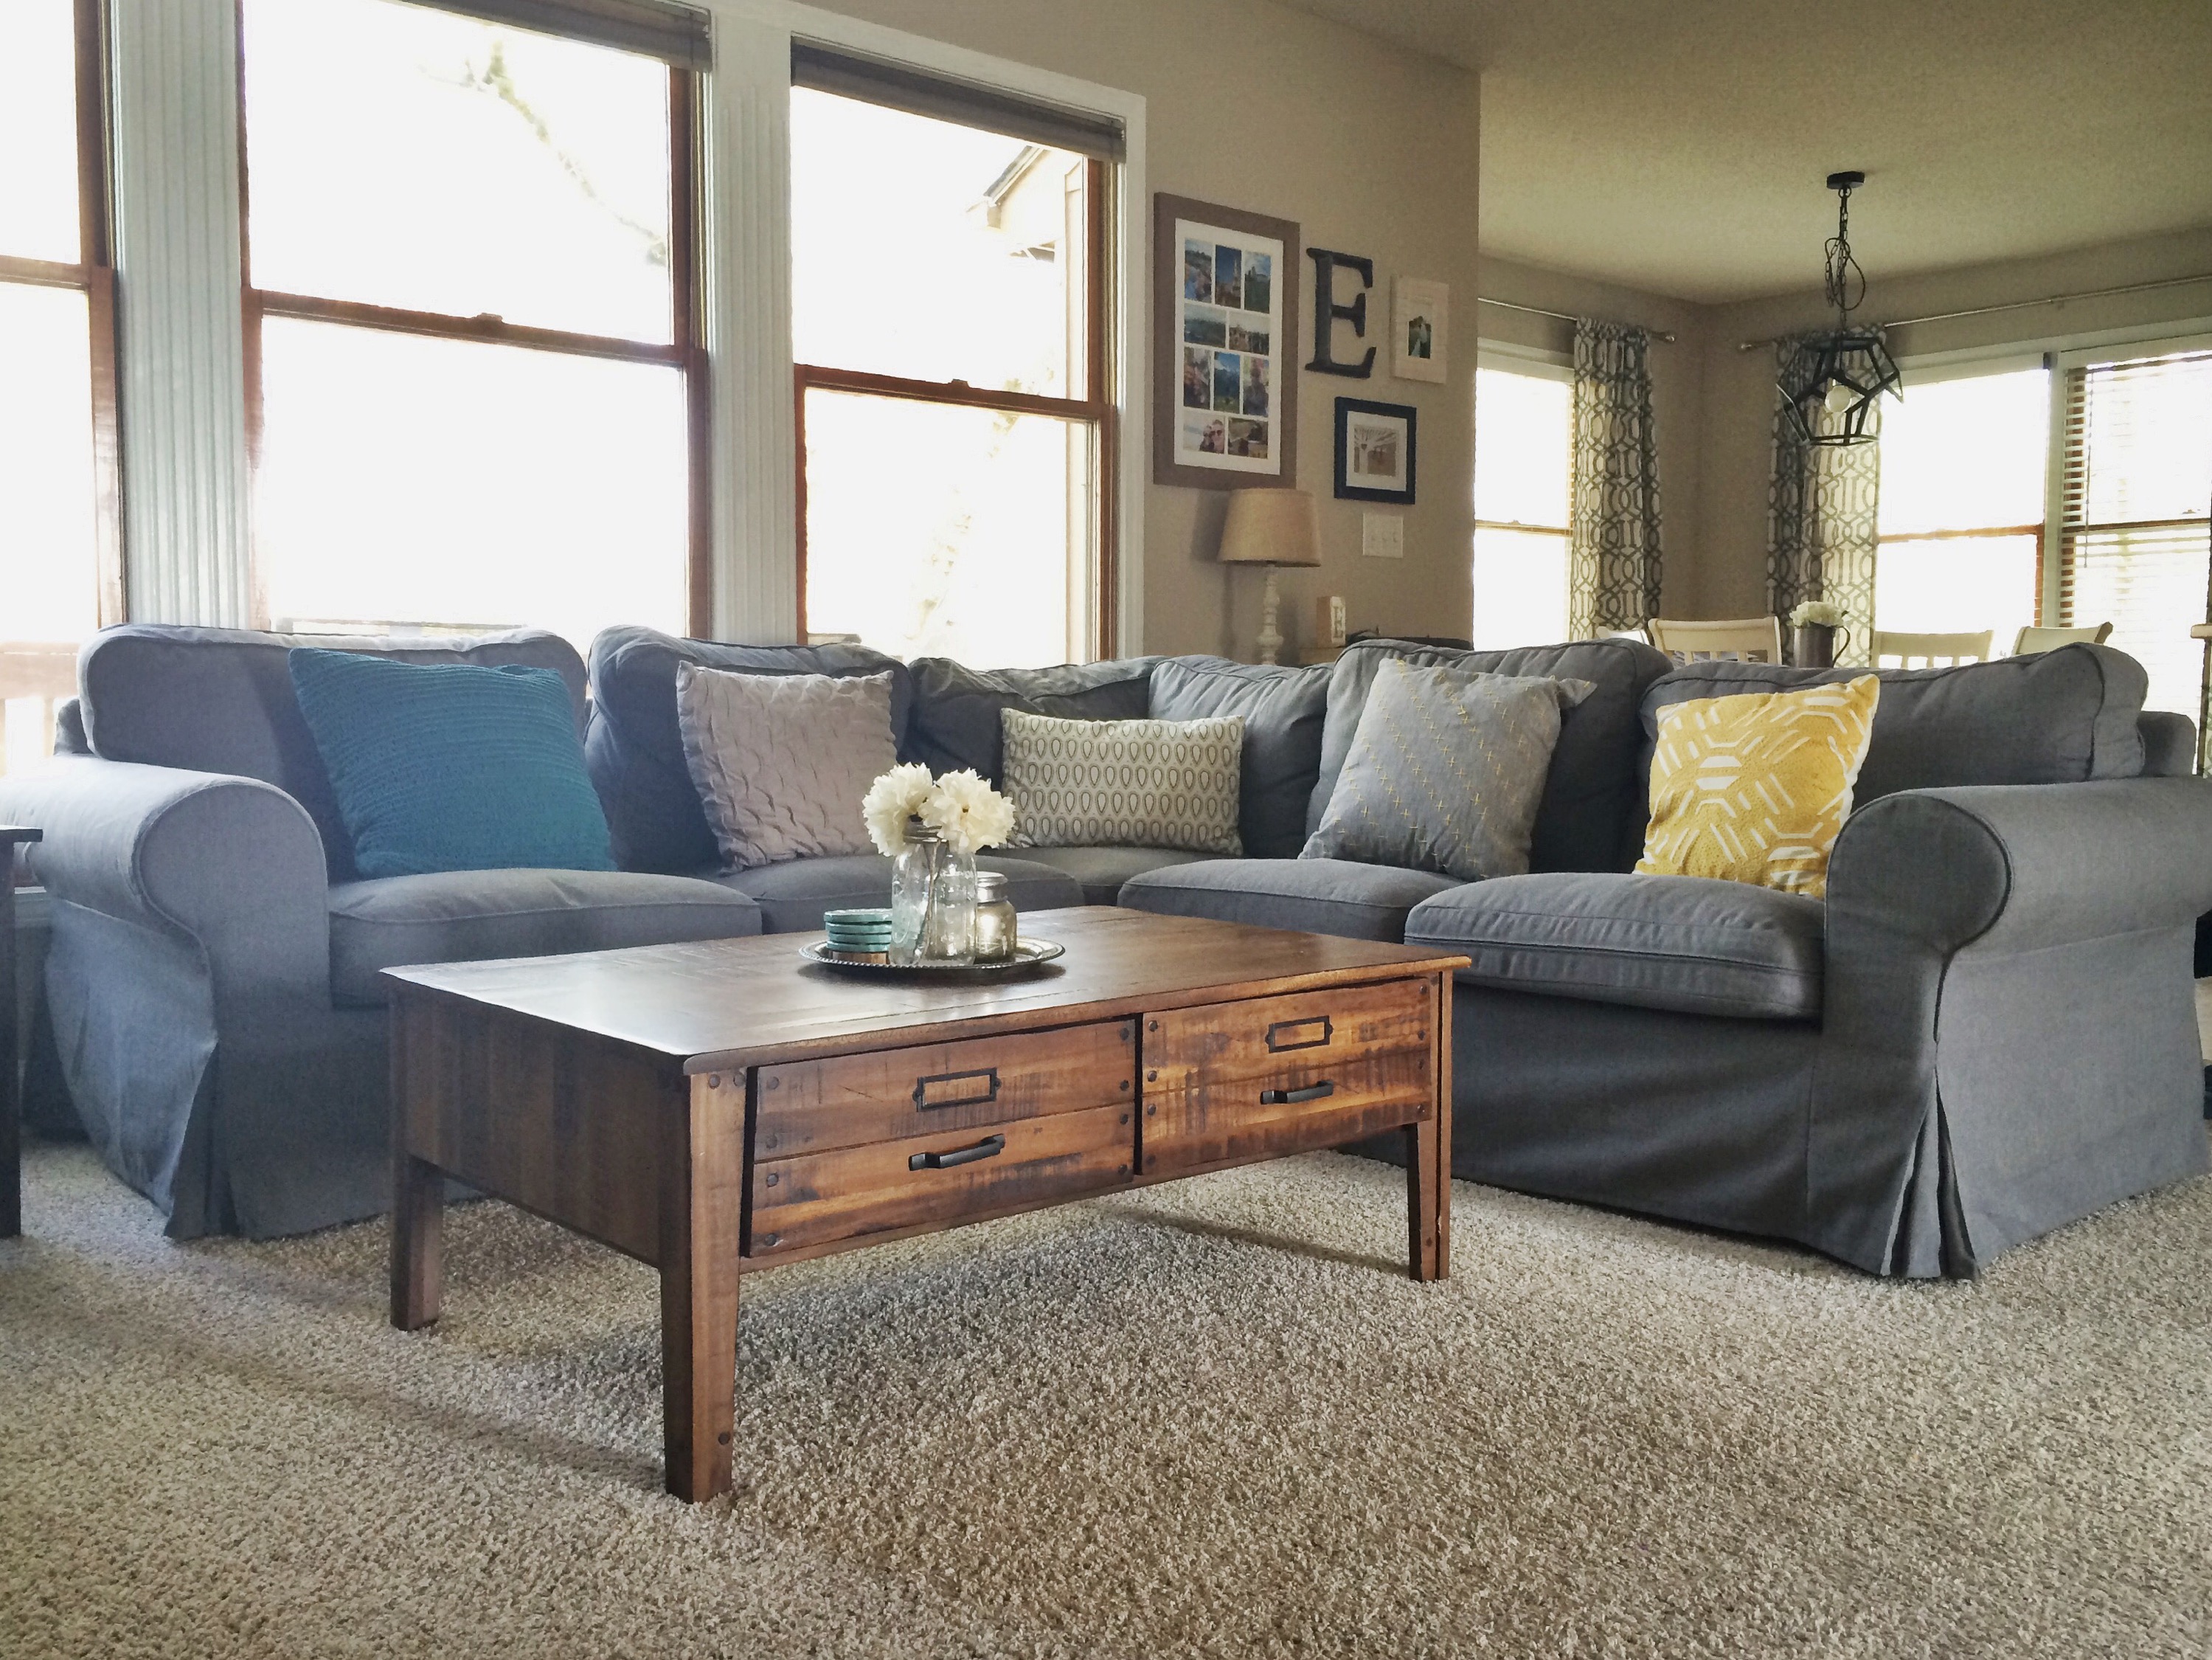
When a brand new Ikea opened up in Kansas City a few months ago, it became THE cool place to visit. I grew up about 15 minutes from an Ikea, so I didn’t quite get the craze until my husband and I visited for my first time as an adult. Let’s just say we walked out with a lot less money in our pockets and with a trunk full of affordable and super cute furniture/decor items! Our biggest purchase was this Ikea Ektorp sectional which we LOVE. It’s super comfy, fits perfectly in our space, and it’s slipcovered for easy cleaning (although let’s be real, I’ve yet to actually wash all the covers since we got a few months ago. Maybe that can just wait for when we have kids?). We were pretty sold on Ikea after our successful couch purchase.
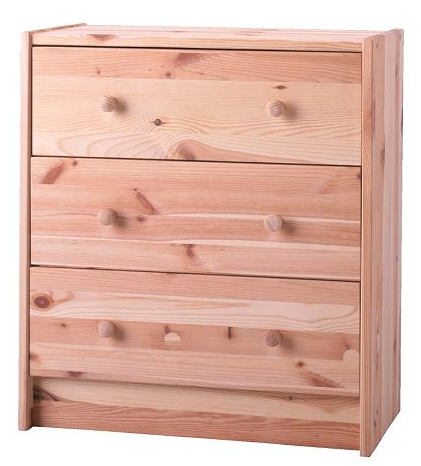
Next up on my Ikea list was the famous Ikea Rast dresser. The master bedroom in our new house was a bit bigger, and we needed bigger nightstands to fill the space around our bed. These little dressers are only $35 a pop, so I figured they would be a great, inexpensive way to try my hand at my very first Ikea Hack!
This is the Ikea Rast dresser in all of its untreated pine glory (and exactly how it looked when we got it). Noooooot my style.
After hubby assembled both of the dressers (I won’t even try to explain that process here. Ikea furniture assembly is a mystery to me), I got to working! As much as I loved the many Ikea Rast Hacks I’d seen that involved adding additional pieces of lattice wood or a larger piece of wood on top, my carpentry skills are seriously limited. I also don’t have much experience with wood staining, and didn’t think pine would be a good wood to start with. I wanted a way to upgrade these dressers that involved nothing more than a paintbrush and some other supplies I had on hand. We might add more someday, but a paint upgrade is always a good first step!